How to Install Magento
This article explains how you can manually install Magento through the cPanel.
For the step-by-step video tutorial on how to install Magento, please visit Install Applications.
Download the Magento Files
- Download the latest version of the software at the official website of Magento.
Upload the Installation Files
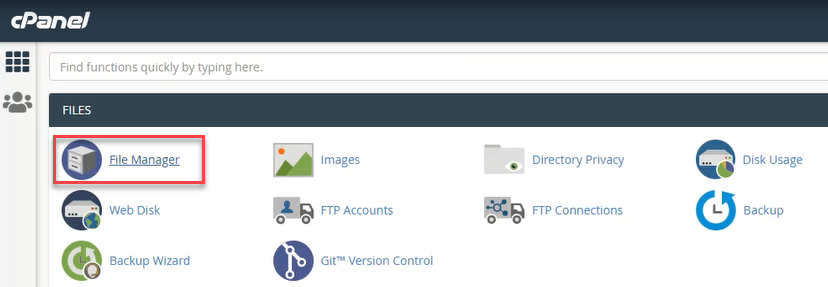
- Inside the cPanel account, go to your File Manager to upload the Magento installation package.
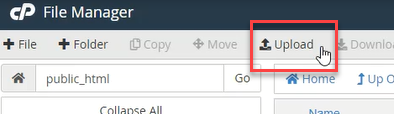
- Choose a folder where you want to upload your files. In this example, files were uploaded in public_html. Once you have decided or created a folder, click Upload.
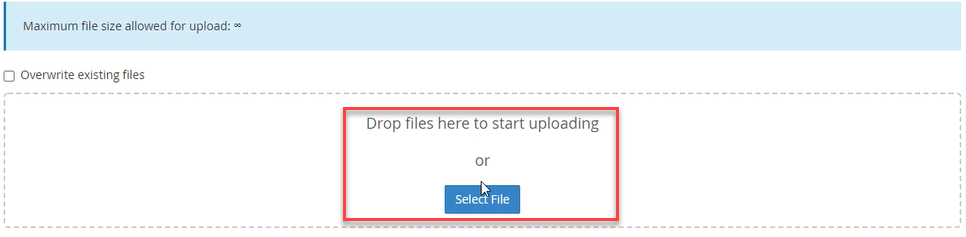
- You can drag and drop the zip file you just downloaded from the Magento official website or click Select File on the upload screen.
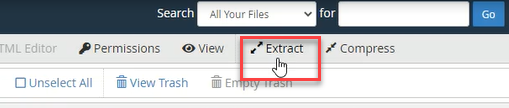
- To extract the uploaded zip files, click the Extract button.
Create a Database
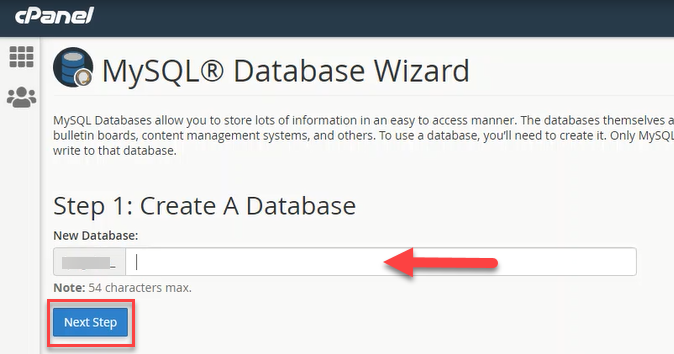
- Create a database and user account for your Magento installation. To do so, click MySQL Database Wizard inside your cPanel.

- Provide a database name, and click Next Step.
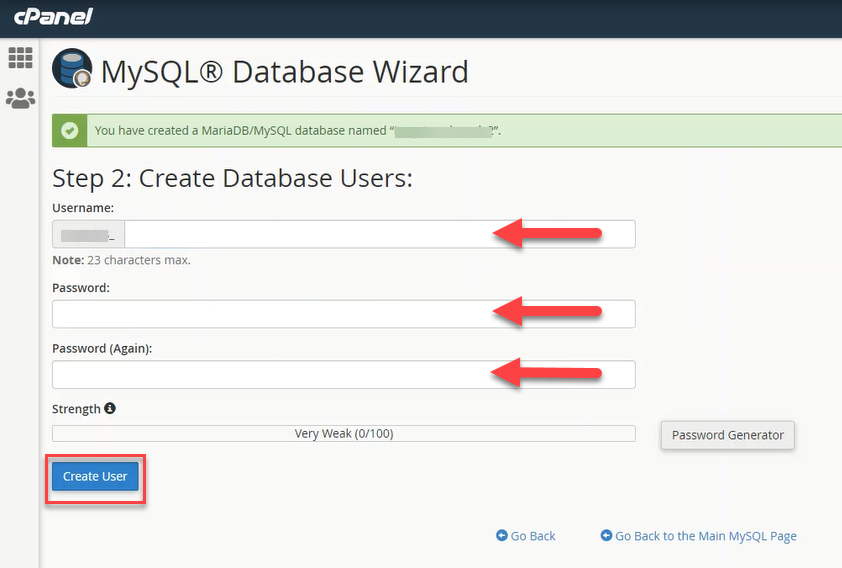
- Create a database username and a password, then click Create User to proceed.
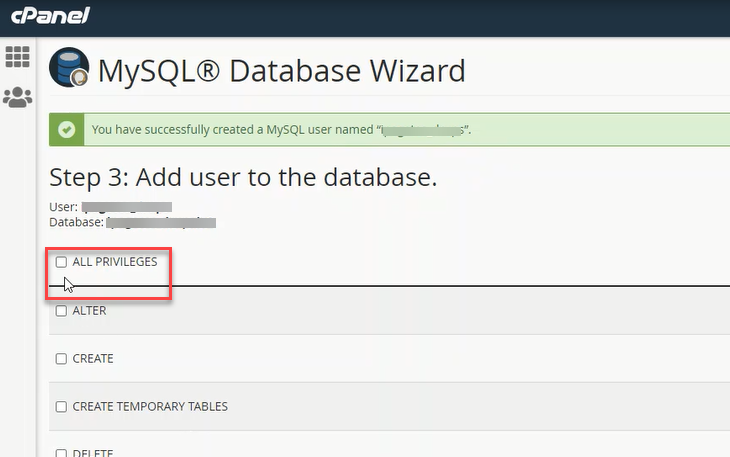
- Ensure that the ALL PRIVILEGES box is checked.
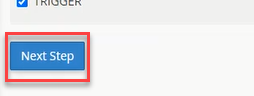
- Click Next Step to finish the task.
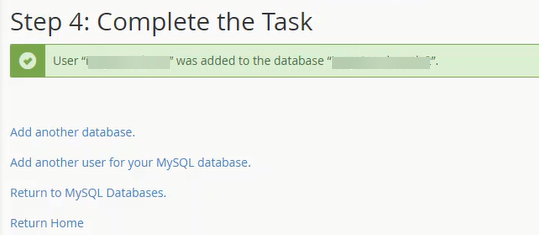
- The new database is now successfully created!
Run the Installation
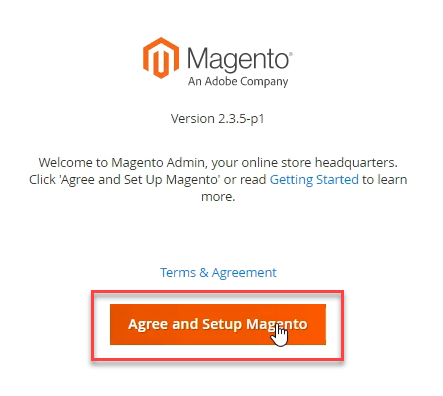
- In your web browser, navigate to the folder where you uploaded the Magento files. In our example, files were uploaded in public_html, so run the installation at https://yourdomainnamehere.com, and you’ll be routed to the first page. Click Agree and Setup Magento button to begin.
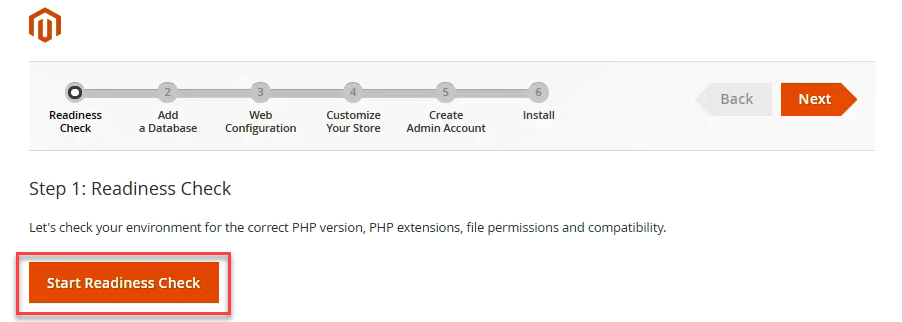
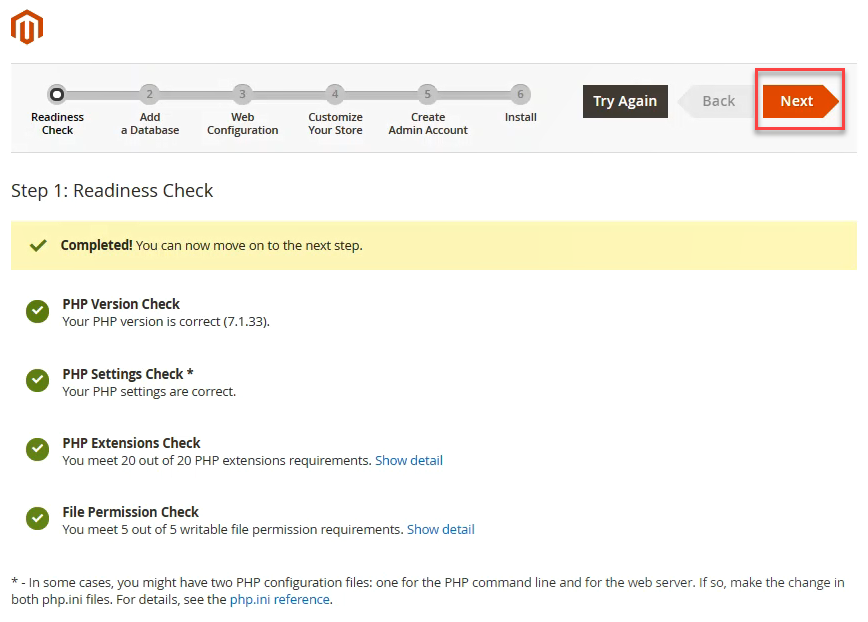
- On the first step, click the Start Readiness Check button to check your hosting settings and see any errors. If all requirements are checked, you may proceed to the next step.
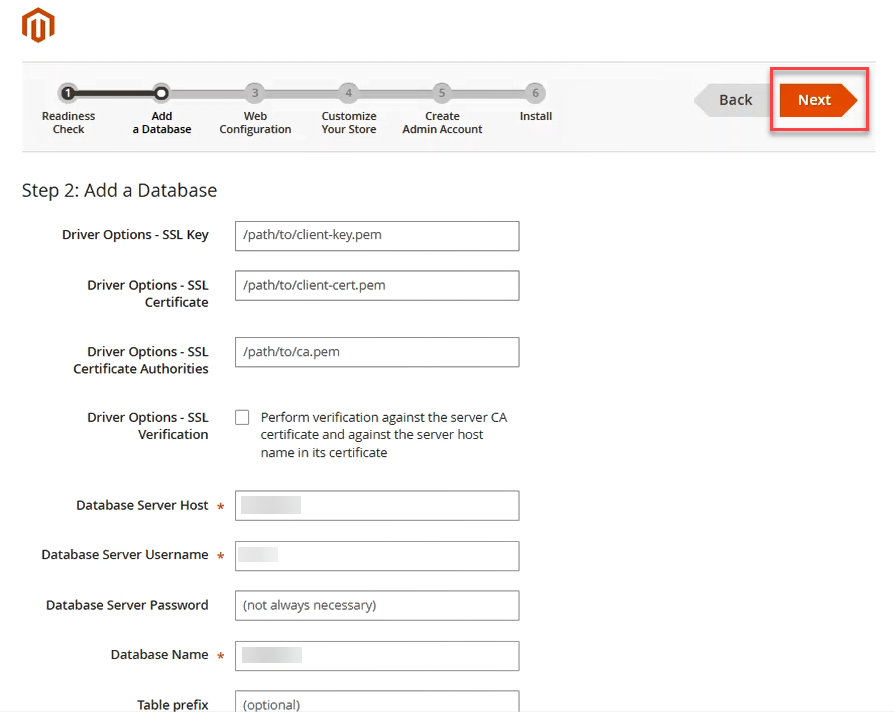
- Under the database configuration, leave the SSL Key, SSL Certificate, SSL Certificate Authorities as default. You may also choose to check or not to check the Driver Options – SSL Verification. Use the MySQL database you have created for Database Name, Username, and Password. Please note that the database server host can be a different value depending on your hosting provider. The table prefix can be left empty since Magento installation will generate a random prefix, then click Next once complete.
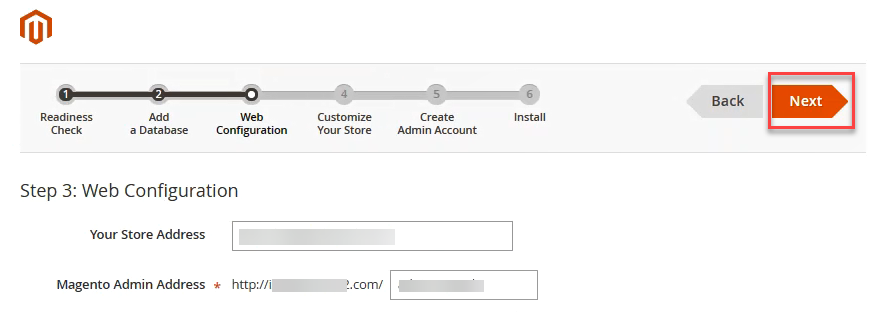
- Enter your store and administrator admin address for the web configuration part, then click Next.
- Customize your store by setting your time zone, currency, and language, then hit Next.

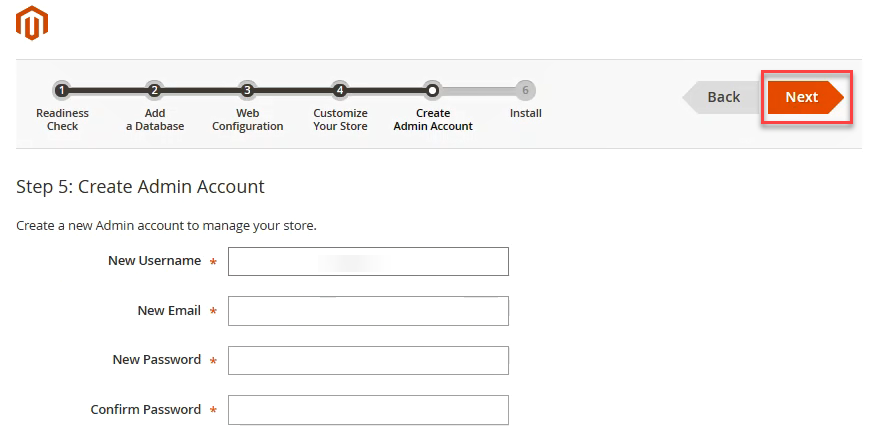
- Here, create your administrator account for your stores, including your username, email address, and password. Make sure that you create a strong password for security reasons, then click Next to proceed to the last step.
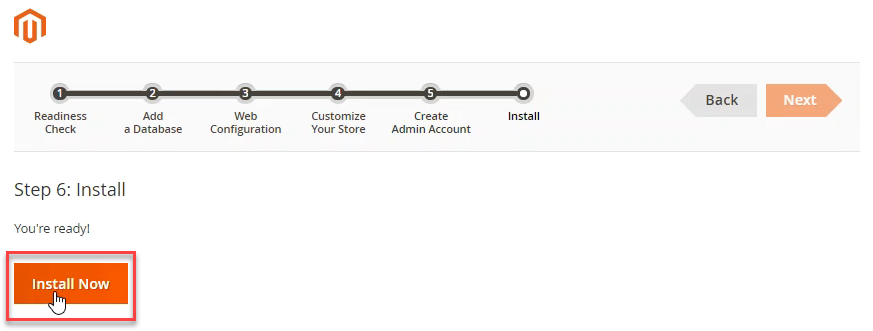
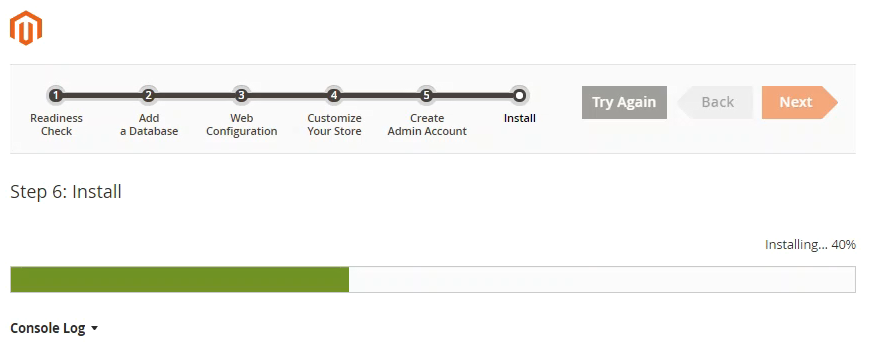
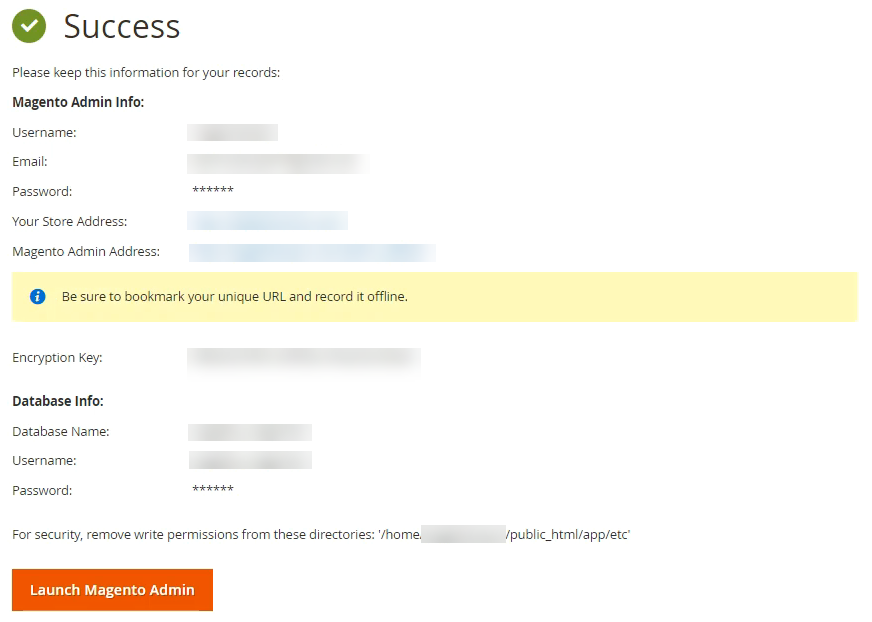
- Lastly, you need to click the Install Now button, to begin with, the installation. Once complete, you will be routed to the next page showing all your installation details!