How to Install PrestaShop
This article explains how you can manually install PrestaShop through the cPanel.
For the step-by-step video tutorial on how to install PrestaShop, please visit Install Applications.
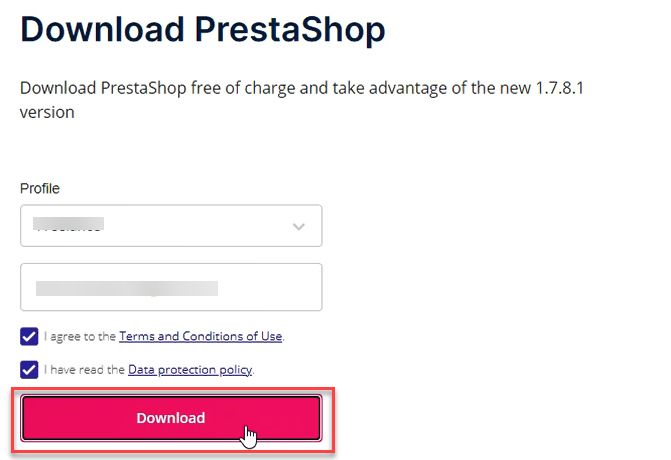
Download the PrestaShop Files
Download the latest version of the software at the official website PrestaShop.
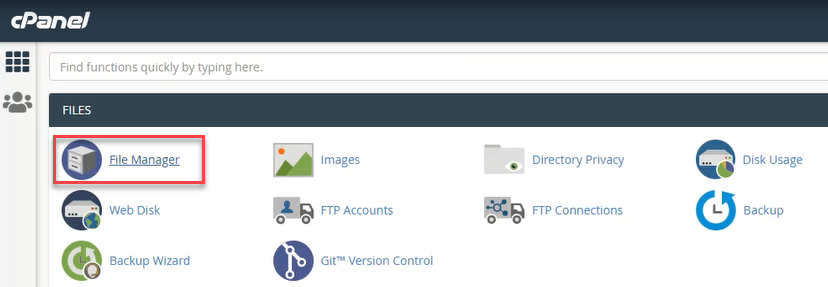
Upload the Installation Files
- Inside the cPanel account, go to your File Manager to upload the PrestaShop installation package.
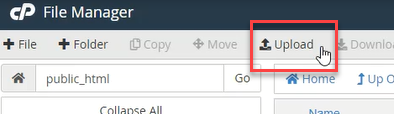
- Choose a folder where you want to upload your files. In this example, files were uploaded in public_html. Once you have decided or created a folder, click Upload.
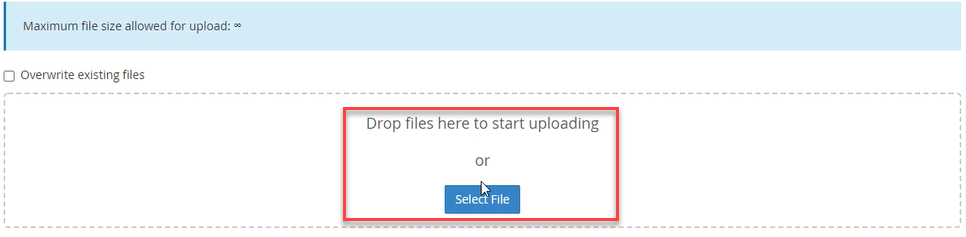
- On the upload screen, you can drag and drop the zip file you just downloaded from the PrestaShop official website, or click Select File.
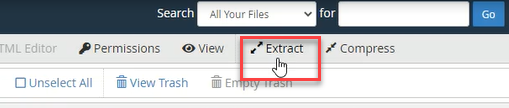
- To extract the uploaded zip files, click the Extract button.
Create a Database
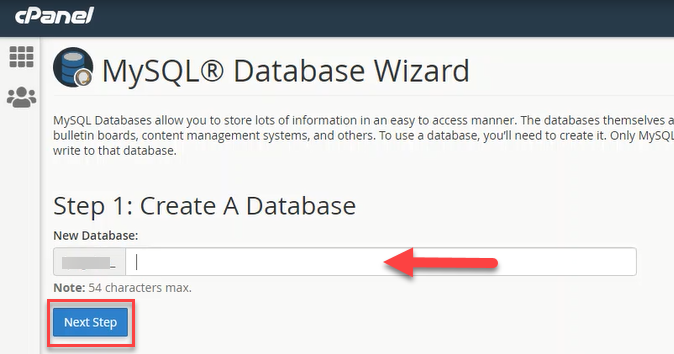
- Create a database and user account for your PrestaShop installation. To do so, click MySQL Database Wizard inside your cPanel.

- Provide a database name, and click Next Step.
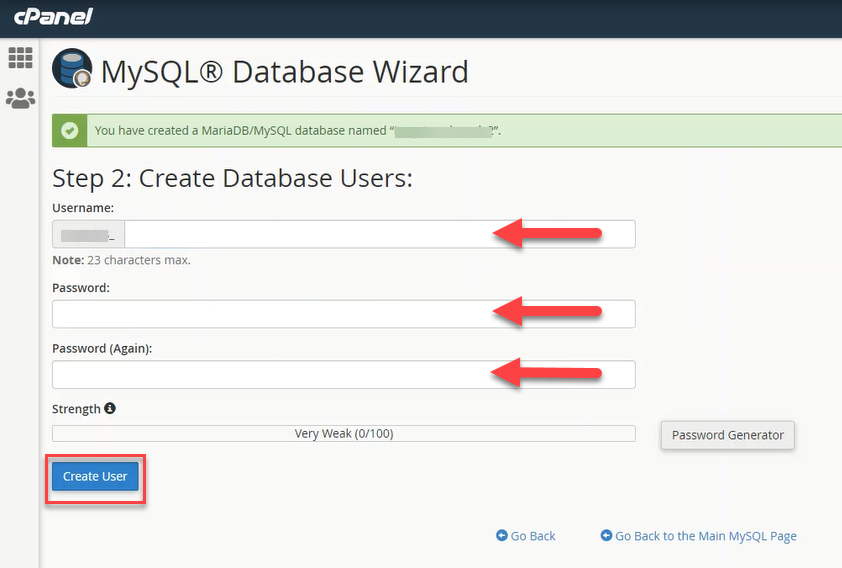
- Create a database username and a password, then click Create User to proceed.
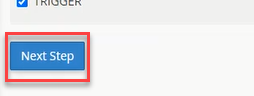
- Ensure that the ALL PRIVILEGES box is checked.
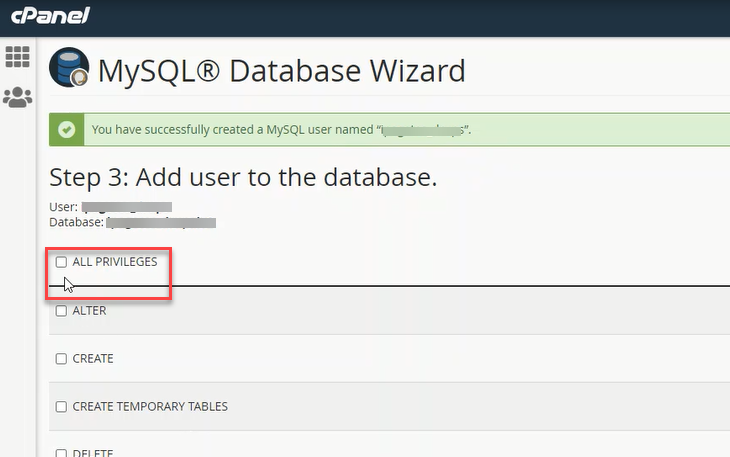
- Click Next Step to finish the task.
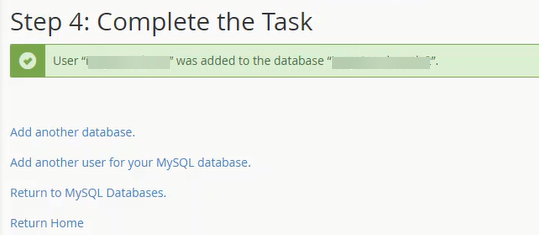
- The new database is now successfully created!
Run the Installation
- In your web browser, navigate to the folder where you uploaded the OpenCart files. In our example, files were uploaded in public_html, so run the installation at https://yourdomainnamehere.com. On the first screen, you’ll be prompted to choose a language, then click Next.

- On the next screen, you will be redirected to the License agreements. Ensure that the terms and conditions box is checked to proceed with the next step.

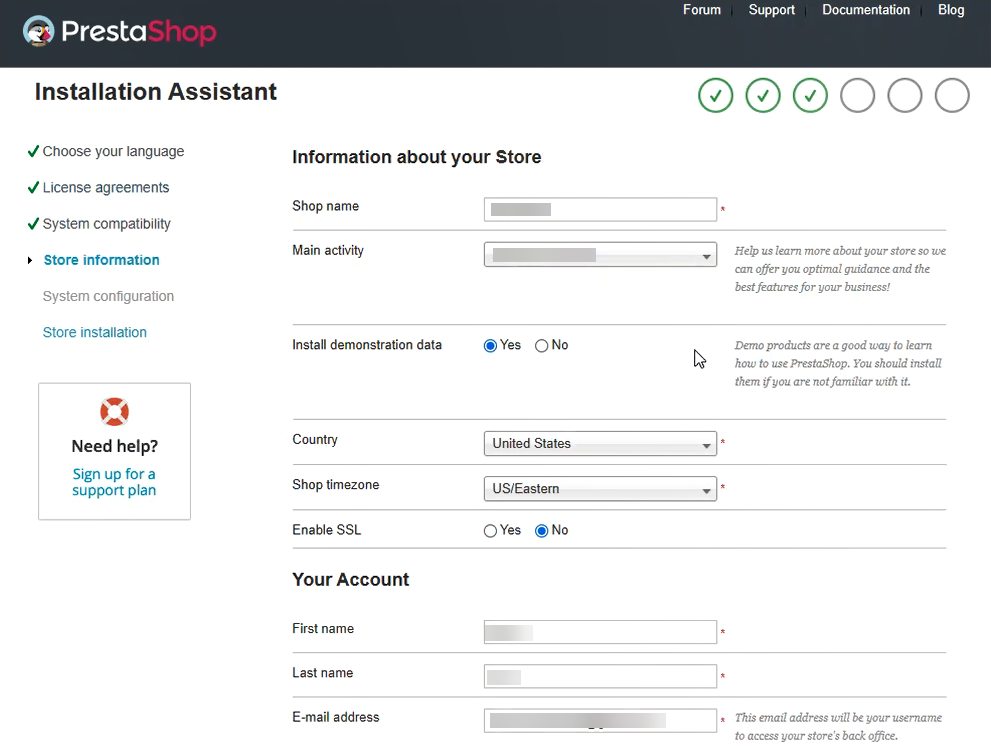
- After determining the system compatibility of your downloaded PrestaShop, you will be redirected to the store information page where you need to fill in the information such as shop name, the shop's main activity, admin name, email address, and password.
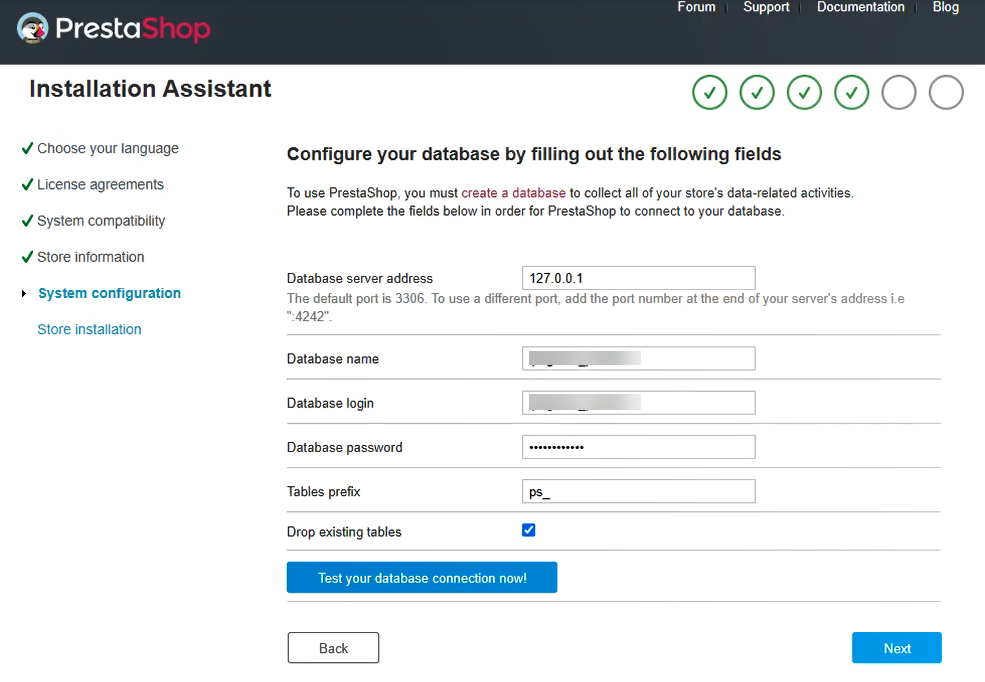
- Here, you have to add the database information which you previously have created. After completing all the information, click on the Next button to complete the installation.
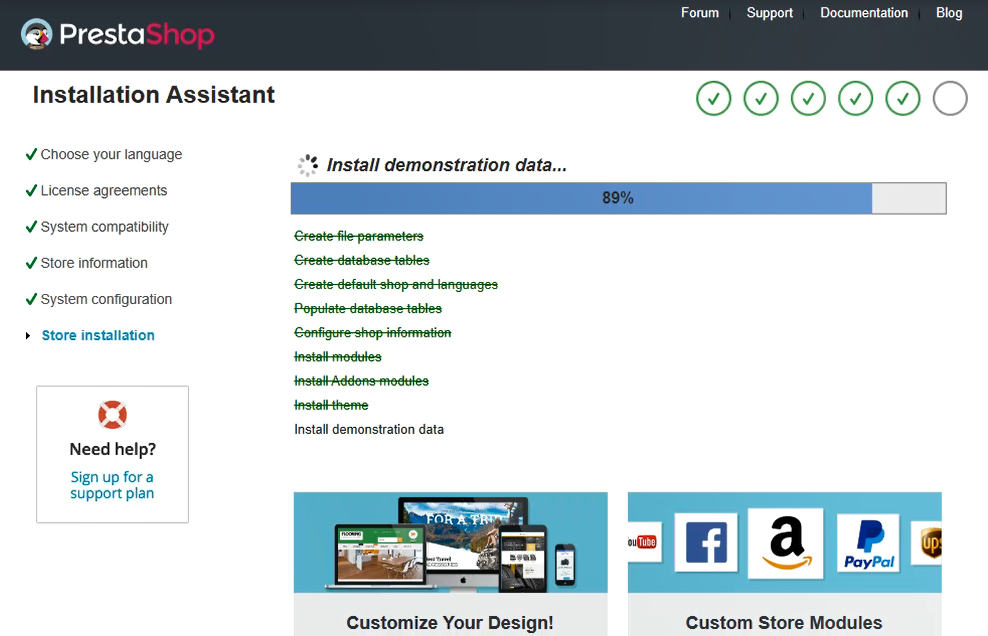
- Wait for the process to be 100% complete.
- Now that the installation is complete, You can choose either one of the two options, i.e., Back Office and Front Office. If you select the Front Office option, you will get to see the website's front page (or home page). Whereas, if you choose the Back Office option, you will be redirected to the link, leading you to the folder that needs to be deleted for further processing.
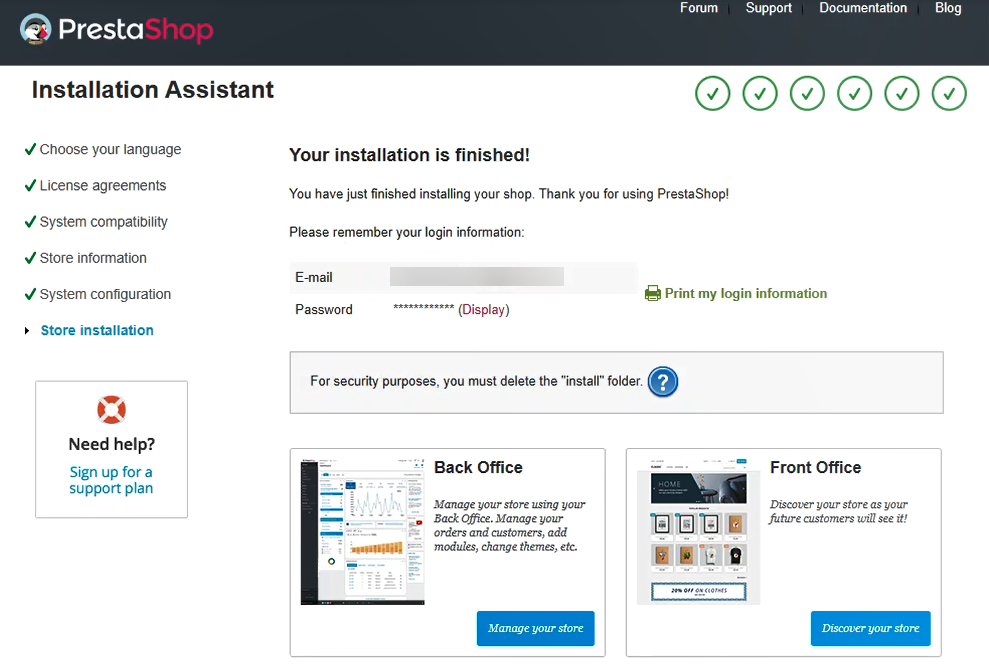
Note: Make sure to remove the install folder after the process is completed. This is highly recommended for security reasons.


